
For my series of posts on the Lambda Calculus, I have developed a lambda calculator. At the time of writing, it only works in “single step mode”: you hit the return key having typed in a lambda expression and it does one beta reduction. Hit the return key again and it does another beta reduction. This is fine as far as it goes, but does get a bit tedious after a while. I’d like a command that will run a series of beta reductions until the expression reaches normal form (i.e. can’t be beta reduced any further), but there is a problem. The problem is that a lambda expression may never reach normal form. A trivial example is (λx.x x) (λx.x x) which just reduces to itself.
Unfortunately, you can’t always tell if a lambda expression has a normal form just by looking at it and, in general, there is no algorithm that will determine that an expression is in normal form. If you find one, congratulations: you have solved the halting problem! This means we need some easy way to terminate the computation if we get bored of waiting, and the traditional means of doing that is to handle a Posix signal, typically the one sent by typing ctrl-c which is SIGINT. If we were using C, this would be simple: we would just call signal(3) with an appropriate handler as a parameter.
sig_t oldHandler = signal(SIGINT, myHandlerToStopEvaluation);
if (oldHandler == SIG_ERR)
{
    // Handle the error
}
else
{
    // Handler successfully installed
}
Why is Signal Handling Hard In Swift?
Actually, even in C, signal handling is hard and a lot of people get it wrong. Your signal handler has to be async signal safe which is a fairly strict form of concurrency. In particular, you can only call other functions that are also async signal safe. Much of the C standard library does not fall into this category. In fact, the list of async signal safe POSIX functions is… limited. If you look at the list, you’ll see that There’s no buffered IO and no memory allocation functions. Even a signal handler as simple as
void myHandlerToStopEvaluation(int s)
{
    printf("Signal %d caught\n", s);
}
is dangerous. printf maintains a buffer for the stdout file descriptor and if the signal is raised while executing printf the results may be unpredictable at the least and a security vulnerability in the worst case.
In Swift, installing a signal handler looks deceptively simple and elegant.
import Darwin

signal(SIGINT)
{
    sigNum in
    print("Signal is \(sigNum)")
}
Yes, you can pass a closure to signal. Unfortunately, apart from print probably relying on printf at some level, there is no way in Swift to tell if a function is using memory allocations. You can’t write a safe signal handler in Swift because you can’t be sure any single piece of Swift code does not involve allocating memory.
Two Alternative Approaches
I have discovered two ways of handling signals in Swift. The first, and official, way uses a DispatchSource designed specifically for the task by Apple. Unfortunately, if I am going to use a dispatch source, I’ll need an event loop, which, in turn means I’ll probably need to redesign the lambda calculator to be event driven. I’m avoiding that for now but I think I will eventually look into it since it is the rightTM way and avoids some synchronisation problems that I expect my alternative way to have.
Instead, I have written my signal handling in C. There is an API to install a handler for a signal and an API to retrieve a flag that tells us whether the signal has been raised. The code for testing the signal handler is in a Swift package called “CLTest” (for “command line test”) and is published in Bitbucket.
Setting Up the C Code
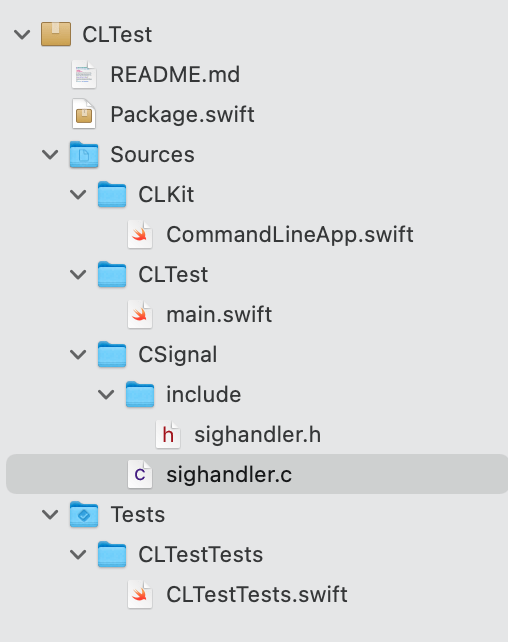
It turns out to be really easy to add C to a package. Start by creating a new folder under Sources for your C code e.g. CSignal then create a subdirectory called include. Your C code goes in the CSignal directory and headers go in the include subdirectory. The structure looks like this:
Then you need a target for the C code and a dependency in any target that is going to use it. This is from my package.swift
    targets: [
        .target(name: "CSignal"),
        .target(
            name: "CLTest",
            dependencies: ["CLKit"]),
        .target(
            name: "CLKit",
	    dependencies: ["CSignal"]),
        .testTarget(
            name: "CLTestTests",
            dependencies: ["CLTest"]),
    ]
And that’s it! Any extern function in the header can be used directly from Swift modules that import CSignal.
The Code Design
The principle is to maintain a set of flags, one per signal type. The flags are normally set, but if we have said we want to monitor a signal and that signal is raised, the flag corresponding to the signal is cleared (this reversal of the obvious sense of true and false is because of the way the C11 atomic API works. APIs exist for the following operations:
- request that a signal be monitored
- test whether a signal has occurred
- restore the signal handler to its former state
The Implementation
It’s pretty simple really. There’s an array of atomic_flag, one per signal type and an array of sig_t to store existing signal handlers in. We use atomic flags because there’s no guarantee that the signal will be handled on the main thread, and if it does, we don’t want it changing while the main thread is testing the flag and resetting it. Furthermore, atomic_flag is guaranteed to be lockless. This means that the signal handler can access it without risk of a deadlock.
This is the signal handler in its entirety:
static void theHandler(int sigNum)
{
    if (sigNum > 0 && sigNum <= SIGUSR2)
    {
        atomic_flag_clear(&unraisedFlags[sigNum]);
    }
}
This is how we start monitoring a signal. Every API call includes a test to make sure the signal number is in range i.e. is between SIGHUP and SIGUSR2.
Result setHandler(int sigNum)
{
    // Make sure the signal is in range
    Result res = validateSigNum(sigNum);
    if (res != CSIGNAL_OK) return res;

    atomic_flag_test_and_set(&unraisedFlags[sigNum]);
    sig_t oldHandler = signal(sigNum, theHandler);
    if (oldHandler == SIG_ERR)
    {
        return CSIGNAL_INVALID;
    }
    savedHandler[sigNum] = oldHandler;
    return CSIGNAL_OK;
}
And this is how we test a signal. We use atomic_flag_test_and_set to ensure the act of testing and setting the flag back for the next signal raise cannot be interrupted.
bool signalRaised(int sigNum)
{
    if (validateSigNum(sigNum) != CSIGNAL_OK)
    {
        return false;
    }
    return !atomic_flag_test_and_set(&unraisedFlags[sigNum]);
}
And this is how we use it in a Swift program:
import Darwin
import CSignal

public struct CommandLineApp
{
    public init() {}

    public func run()
    {
        CSignal.setHandler(SIGINT)
        for i in 0 ..< Int.max
        {
            guard !CSignal.signalRaised(SIGINT) else { break }
            if i % 1000000 == 0
            {
                print("Iterated \(i) times")
            }
        }
        print("\nCaught ctrl-c and Terminated")
    }
}

CommandLineApp().run()
And there we go: a simple and (hopefully) signal safe way to handle signals within a Swift program.

Thank you, I have recently been looking for info about this subject for ages and yours is the best I’ve found so far.
LikeLiked by 1 person